Microgreen Radish Certified Organic

SKU: MG111

The vibrant and colourful stems on these red radish makes them a delightful garnish. Flavour is mildly spicy with the classic... Read More

Microgreen Radish Certified Organic has a rating of 4.8 stars based on 4 reviews.
Click here for more options
Shipping & Returns

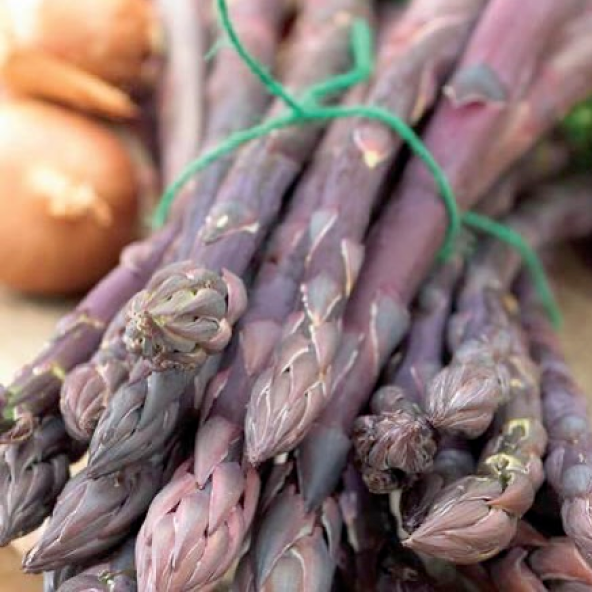
West Coast Seeds ships anywhere in North America. However, we are not able to ship garlic, potatoes, asparagus crowns, bulbs, onion sets, Mason bee cocoons, or nematodes outside of Canada. We regret, we cannot accept returns or damages for orders outside of Canada. The minimum shipping charge to the US is $9.99.

Microgreen Radish Certified Organic

Product Details

The vibrant and colourful stems on these red radish makes them a delightful garnish. Flavour is mildly spicy with the classic radish kick. Like other microgreens, micro-radish is packed with nutrients! They are an excellent source of vitamins A, C, E, and K, as well as calcium, iron, and dietary fibre. They also contain high levels of antioxidants too.

Liven up a salad or sandwich with a sprinkle of micro-radish.

Quick Facts:

    • Very fast growing
    • Colourful purple/red stems
    • Mildly spicy, radish flavour

We'll notify you when this product is back in stock.


Microgreen Radish Certified Organic

We don't share your information with others.

Your notification has been registered.  Click to close!

All About Microgreen Radish Certified Organic

General

General
Microgreens are baby salad greens, a little bit like sprouts, but grown in soil. While sprouting seeds need to germinate quickly so the seeds don’t rot, microgreens can be planted just like any other herb or vegetable seeds. That means that seeds with longer germination requirements can still be grown as microgreens. Think of basil, carrots, spinach, and any other edible greens. It’s useful to learn how to grow microgreens, because you can grow them indoors all winter for a nutritious source of fresh vegetables.

Difficulty

Difficulty
Easy

We Recommend: If we have to make one recommendation, it has to be Sunflower Microgreens (MG435). They’re just so unusual, with a delicious flavour you would never expect without trying them. Unlike many other types of microgreens, these are large and substantial, and they work really well with any kind of dressing.

For Urban Gardeners:

For Urban Gardeners: Microgreens are all about down-sizing, so they can be grown just about anywhere. Instead of recommending a specific seed, we recommend the Growlight Garden (ZHG289A), which can be used to produce masses of microgreens on a continuous basis in only 2 x 3 feet!

Season & Zone

Season & Zone
Microgreens can be grown at any time of the year as long as you can supply enough light.

Timing

Timing
Timing microgreens depends on the individual kinds of greens you will be growing. Cress grows really fast, and can be harvested a few days after sowing. Carrot seeds can take as long as 2 to 3 weeks to germinate, so you should expect to allow extra time.

Starting

Starting
Follow the planting instructions for each variety of seeds. For instance, some seeds prefer to be sown on the surface of the soil, while others need to be covered. We recommend using sterilized seed starting soil in shallow trays that have drainage holes at the bottom. You could try growing microgreens in 12-cell plug inserts that have been inserted into seedling germination trays. You can also grow microgreens in recycled plastic containers or clamshell packaging, as long as you poke some drainage holes in the bottom. Using a seedling warmer will increase the speed of germination, but it is not strictly necessary.

Spread the sterilized soil to a depth of only 2-3 inches. You’ll be harvesting the baby seedlings, so they don’t need a lot of room to grow roots.

Sow microgreen seeds fairly densely, a little less dense for large seeds like sunflowers or Swiss chard. Once your microgreen seeds have been planted, mist the whole area. You want to keep the soil moist like a wrung out sponge, but not sitting in water. Keep your mist sprayer handy, and spritz the soil regularly. The nice thing about using seedling germination trays is that you can take a second tray and invert it over the planted tray. This traps moisture inside, and prevents rapid evaporation.

Growing

Growing
As soon as the first sprout is visible above the soil, remove the tray from the seedling warmer (if using), and remove the cover (if using). Bright light is essential for growing microgreens. From late spring to early autumn, microgreens can be grown outdoors under daylight conditions. But indoors, you will need to provide some kind of supplemental light, particularly in the short, dim days of winter. The Growlight Garden is one of the best microgreen growing systems we have found. It even has a self-watering mechanism, which makes the whole process much easier. But any way you can provide light from T5 fluourescent tubes or other grow lights will work. Aim for full spectrum lights.

This bright light will help keep your microgreens short and stout. When light is insufficient, the sprouts will grow long and spindly.

Harvest

Harvest
Microgreens can be pulled from the soil and rinsed until all the soil particles have washed away. They can be enjoyed whole, roots and all. Or simply trim them with scissors and dispose of the used soil in your compost.

Microgreens are intended to be harvested when the first leaf pair (the cotyledon, or seed leaf) opens fully and turns green. This is the point at which your microgreens will be richest in nutrients. However, you can also let the seedlings continue to grow and harvest them as needed. Be aware that the longer they are left to grow the more roots will also develop in the soil.

How to Grow Microgreens

Step 1

Timing

Timing microgreens depends on the individual kinds of greens you will be growing. Cress grows really fast, and can be harvested a few days after sowing. Carrot seeds can take as long as 2 to 3 weeks to germinate, so you should expect to allow extra time.

Microgreens can be grown at any time of the year as long as you can supply enough light.

Step 2

Starting

Follow the planting instructions for each variety of seeds. For instance, some seeds prefer to be sown on the surface of the soil, while others need to be covered. We recommend using sterilized seed starting soil in shallow trays that have drainage holes at the bottom. You could try growing microgreens in 12-cell plug inserts that have been inserted into seedling germination trays. You can also grow microgreens in recycled plastic containers or clamshell packaging, as long as you poke some drainage holes in the bottom. Using a seedling warmer will increase the speed of germination, but it is not strictly necessary.

Spread the sterilized soil to a depth of only 2-3 inches. You’ll be harvesting the baby seedlings, so they don’t need a lot of room to grow roots.

Sow microgreen seeds fairly densely, a little less dense for large seeds like sunflowers or Swiss chard. Once your microgreen seeds have been planted, mist the whole area. You want to keep the soil moist like a wrung out sponge, but not sitting in water. Keep your mist sprayer handy, and spritz the soil regularly. The nice thing about using seedling germination trays is that you can take a second tray and invert it over the planted tray. This traps moisture inside, and prevents rapid evaporation.

Step 3

Growing

As soon as the first sprout is visible above the soil, remove the tray from the seedling warmer (if using), and remove the cover (if using). Bright light is essential for growing microgreens. From late spring to early autumn, microgreens can be grown outdoors under daylight conditions. But indoors, you will need to provide some kind of supplemental light, particularly in the short, dim days of winter. The Growlight Garden is one of the best microgreen growing systems we have found. It even has a self-watering mechanism, which makes the whole process much easier. But any way you can provide light from T5 fluourescent tubes or other grow lights will work. Aim for full spectrum lights.

This bright light will help keep your microgreens short and stout. When light is insufficient, the sprouts will grow long and spindly.

Step 4

Harvest

Microgreens can be pulled from the soil and rinsed until all the soil particles have washed away. They can be enjoyed whole, roots and all. Or simply trim them with scissors and dispose of the used soil in your compost.

Microgreens are intended to be harvested when the first leaf pair (the cotyledon, or seed leaf) opens fully and turns green. This is the point at which your microgreens will be richest in nutrients. However, you can also let the seedlings continue to grow and harvest them as needed. Be aware that the longer they are left to grow the more roots will also develop in the soil.

Customer Reviews & Questions