Prairie Coneflower

SKU: FL3832
Ratibida Prairie Coneflower seeds are useful for water-wise xeriscaping plans because the plants are native to the central prairies and mountains, and accustomed to drought, high heat, and high humidity. Read More

Exposure Full-sun

Prairie Coneflower has a rating of 5 stars based on 1 reviews.
Click here for more options
Shipping & Returns

West Coast Seeds ships anywhere in North America. However, we are not able to ship garlic, potatoes, asparagus crowns, bulbs, onion sets, Mason bee cocoons, or nematodes outside of Canada. We regret, we cannot accept returns or damages for orders outside of Canada. The minimum shipping charge to the US is $9.99.
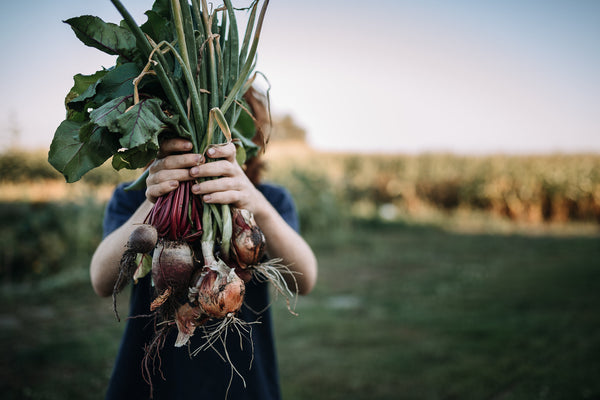
Prairie Coneflower

Product Details

Ratibida columnifera. Plant this perennial wildflower in your organic flower garden, or grow it in containers. Ratibida Prairie Coneflower seeds are useful for water-wise xeriscaping plans because the plants are native to the central prairies and mountains, and accustomed to drought, high heat, and high humidity. The central cone of each flower is surrounded by lovely bright red petals tipped in fiery sun-bright yellow. The strap-like leaves are bluish green and form a rosette. Avoid getting the leaves wet (or water only first thing in the morning) to prevent the onset of foliar disorders like powdery mildew. Flowers appear from late spring to autumn, and stems can range from 60-150cm (24-60") tall.

Perennial.

Quick Facts:

    • Useful xeriscaping flower
    • Perennial
    • Bright red and yellow
    • Grows to 150cm (60") tall

We'll notify you when this product is back in stock.


Prairie Coneflower

We don't share your information with others.

Your notification has been registered.  Click to close!

All About Prairie Coneflower

Difficulty

Difficulty
Easy

Season & Zone

Season & Zone
Exposure: Full sun to partial shade, depending on the blend

Timing

Timing
Try to direct sow wildflower seeds during the period two weeks before, and eight weeks after, your last average frost date. Sowing when there is some risk of minor frost may improve germination. Wildflower seeds can also be sown in the autumn, but a certain percentage of seeds to may be lost to water, birds, and animals. To make the most of the annual species, direct sow in early spring.

Starting

Starting
Site Selection: If there are already no plants (including weeds) growing in the planting site, there may be a problem with the soil. Possible issues may be soil fertility, lack of drainage, or the need for soil amendments to improve texture. In such spots (eg, beneath a cedar tree), few plants will thrive, including wildflowers.

Site Preparation:

Site Preparation: Remove as much existing vegetation as possible through pulling or tilling under in order to minimize competition. Loosen the soil by scraping, raking, or tilling. Wildflower blends will not usually take if planted into existing lawn because the thatch prevents their contact with soil.

Seed Application:

Seed Application: In small areas, seeds can be scattered by hand. In larger areas, you may want to employ a lawn spreader or some other mechanical means. We recommend adding 1-2 parts clean, dry sand to 1 part wildflower seeds which will help the seeds spread evenly. Do not use beach sand, as it usually contains salt. It may be wise to spread most of the seed, but to save some for filling in bald spots at a later date. Seeds must come into contact with the soil in order to germinate. Do not bury seeds more than 2-3 times their thickness.

Planting rates:

Planting rates: Aim for a planting density of 70 seeds per square foot. 90g of seeds will cover 1,000 ft². Use 4kg per acre. 500g covers about 5,500 ft². If seeding an area where site preparation and weeding are not possible, double this rate.

Growing

Growing
Keep the seeded area as evenly moist as possible to help the seeds germinate and the young seedlings become established. Weeds need to be kept under control. Once they are growing, most mixes will not require additional water except in long periods of hot, dry weather. All of our mixes should re-grow for several years, but will eventually benefit from re-seeding. In late summer, many of the components will produce seed heads that can be harvested and replanted the following spring.

How to Grow Ratibida

Step 1

Timing

Start transplants in a cold frame in early spring, or direct sow in May to June. Starting indoors requires vernalization – wrap planted pots in plastic and store in the refrigerator for one week, and then provide 20°-24°C (68°-75°F). Do this step 4-6 weeks before planting out. Seeds will germinate in 7-42 days.

Step 2

Starting

Barely cover the seeds with soil. Transplant or thin to stand 30-60cm (12-24″) apart.

Step 3

Growing

Stake tall growing plants in windy gardens. Ordinary, well-drained soil will do. Ratibida is susceptible to foliar diseases like powdery and downy mildew, fungal spots, and leaf smut. To avoid these, mulch around the plants and only water in the morning, avoiding getting the leaves wet. These plants are highly resistant to heat and humidity, and they are suitable for xeriscaping.

Customer Reviews & Questions