


You’ve selected your seeds, you’ve invested in unfamiliar seed starting equipment, you’ve planted the seeds — and now the damn things are coming up! What to do?!
Lesson One: Take it easy. Remember that seeds are just like any other embryo, and that their parents have bestowed upon them a supply of food to get them started. As seeds germinate, they use this food to unfurl their first leaf/leaves, and to pop out a tiny, rudimentary root with which to take in water and nutrients. As those first leaves unfurl, the plants will begin taking energy from the sun through photosynthesis. Our approach is to lay off all fertilizers until it’s time to transplant them into their permanent growing spots. Seedlings just don’t need a lot of food. They need bright light and a steady, but moderate supply of water.

Lesson Two: Watering is part of the process. If you’ve used sterilized seedling mix to start your seeds indoors (a sensible choice), you can rely on it to provide two key essentials to your seedlings. The first is even moisture, and the second is drainage of excess moisture. You want the soil to feel just moist. After some practice, you will be able to look at the soil surface and judge by its colour whether more water is needed. If not enough water is present, the soil will be a lighter colour, it will feel dry to the touch, and your seedlings will shortly begin to show signs of stress by wilting. If too much water is present, the roots of the seedlings will not have access to the oxygen that normally fills spaces between soil particles, and the plants will drown. Too much moisture can also encourage the growth of mould and even the fungus that causes “damping off,” which is something to avoid.
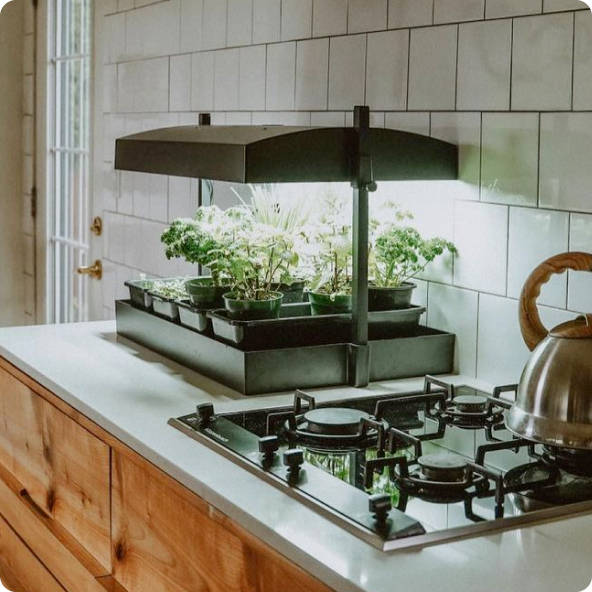
Lesson Three: You can’t over-apply light. The grow lights & reflectors that are on the market now are much better than they used to be. Some credit is owed to the ingenuity of marijuana growers in developing these products, it must be said. Keep your grow lights close to your plants (10cm / 4″ above the top leaves), and expose your plants to 12-18 hours of this bright light every day. This will make all the difference by keeping the plants compact and strong.

Lesson Four: Those heat mats really do work. Seedling heat mats will shorten the germination period by several days in many cases. With tomatoes and peppers (which can be agonizingly slow sprouters), the difference is substantial. But once your seedlings sprout, take them off the mat so the soil cools down again. As with a lack of light, soil that is too warm can cause legginess — tall, spindly plants with weak stems. Use the heat for germination, and then move your seedlings to a cooler environment to slow down their growth. Stout, strong seedlings are what you’re looking for.
Lesson five: Air circulation is your friend. Once your seedlings sprout, remove the plastic dome from over your tray. The seedlings do not benefit from intense humidity. And if you leave a domed seed tray in direct sun, you can end up with a tray of steamed seedlings. Air moving around your seedlings will reduce the moisture that can lead to mould and fungus, and it will actually help to strengthen the stem tissues of the plants, to boot.
Lesson Six: Cats can’t help it. At least in our experience. Even if they don't like the taste, they sure love to pull a seedling out of its tray and spit it out. Keep your seedlings well protected from cats, toddlers, and all other curious onlookers! Filling up all the spare space on your planting table with watering cans, stacks of pots, and other odd objects will usually keep cats from investigating in the first place.

Lesson Seven: Stay rational. It’s easy to become emotionally attached to seedlings, and that can interfere with both judgment and actual success with seeds. Some gardeners have asked us in early March at what point should they be potting on their sunflowers, because they seem to be getting big. Well, the brutal truth is that they were planted too early: by the time it’s warm enough outside to transplant them, they will be huge plants already, with such confined roots that they will not be able to develop the sturdy anchor they need to remain upright. Our advice was to toss the plants away and plant new seeds at an appropriate time. You wouldn’t sow them indoors before the middle of March, and that’s the very earliest date. But simply discarding plants that you have grown from seed can be too much to bear for many people.
This emotional attachment can lead to other kinds of mistakes, too. Plants rarely benefit from being fawned over. It may actually help to think of seed starting as a mechanical process, like the assembly line approach commercial growers need to take with seeds. It’s a useful exercise to plant 500 of something (or 1,000 or 10,000), because you just can’t afford to fuss over them. We grow thousands of mass plantings every year for our organic trial gardens. It still feels rewarding to see the seeds sprout and the plants do well, but in the home setting it can be tempting to obsess over individual seedlings. Try not to.
Lesson Eight would be about “potting on.” Potting on is the process of moving one seedling into a larger container with more soil to allow for root growth. Remember that the plants are growing below the soil as well as above. Healthy roots will allow the mature plant to take in moisture and nutrients easily. There is no hard and fast rule about when it’s appropriate to pot on. In the case of tomatoes, you may be able to gently tip the root ball out of the existing pot and judge by the number of visible roots if potting on is called for. Whenever you handle seedlings, handle them only by the root ball. Their stems are easily bruised by even light pinching. The need to pot on is largely dictated by the size of the container the seed sprouted in. The cells in our 12-cell seedling flats are much larger than those in our 128-cell flats. More room means the seedlings can stay in the 12-cell flat for two to three weeks longer than one planted in a 128 flat. If you see roots emerging from your jiffy pellet or Cow Pots, it’s obviously time to pot on the seedling. Those roots want to grow into more soil.

Lesson nine: Label everything. The greater the variety of seeds you are planting, the easier it is to lose track of which is which. It is common to carelessly mix up pepper varieties in a home garden, having three seedlings each of four types of pepper, and thinking you'll just keep the three pots of each together, with only one label identifying them. Of course, once they start getting potted on into larger containers, and getting moved around to make room for new seed trays of other plants, they get mixed up. Pepper seedlings look, for the most part, interchangeable, so you'll have to wait until they actually set fruit to tell them apart. So err on the side of caution, and label as you go.
The tenth and final lesson: Start all of your leafy greens indoors in trays. Try the 72 and 128-cell trays particularly for this purpose. It can be worth the effort of tediously planting a single seed per cell, and then getting them on a heat mat until germination. After the majority in the tray have sprouted, remove the heat mat and put them in a bright, but cool room. If you have a south facing sun room for this purpose, great but if you don't, we recommend purchasing some artificial light, like the Sunblaster LED Growlight. When seedlings have reached the right size to transplant, pop them out of the cells with a length of ¼” dowel, and transplant them into a prepared row. We find this is the most economical way of planting leafy greens. There’s no over-planting or thinning involved, and you always get a plant where you want it to be in the row. If some of the seeds in your flat don’t germinate (and this will always be the case), just let the soil mix dry out, and it can be reused.